#Intro
Install Windows on Digital Ocean
In this section, we will learn how to Install Windows on DigitalOcean. There are two methods:
- 1. Custom Images
- 2. Recovery Method
- 3. Direct Method
#Using Custom Images
Video Tutorial
- Step One
-
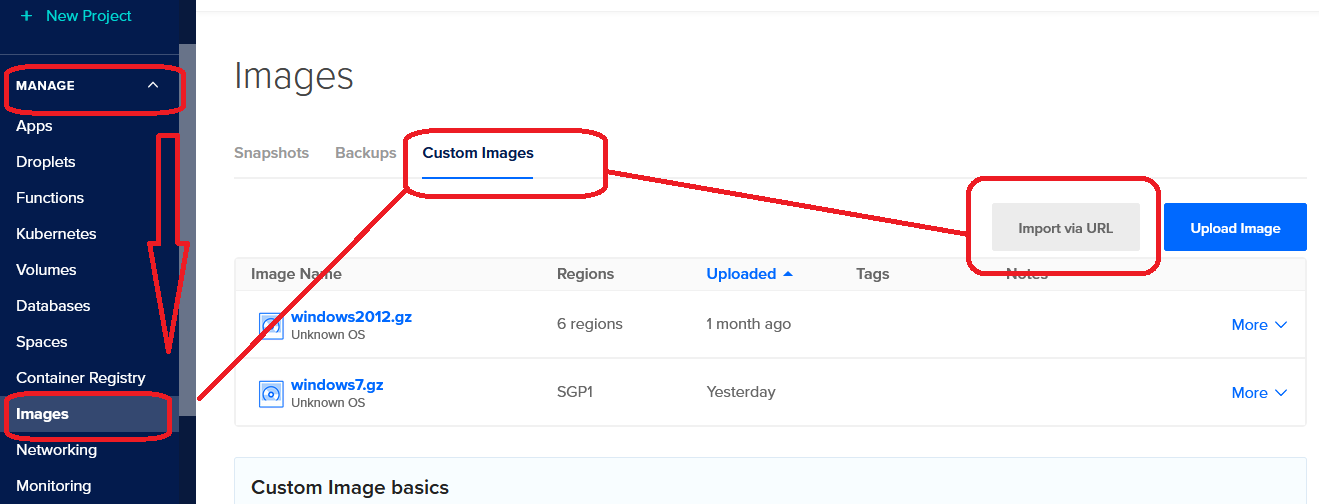
Go to Manage - Image - Custom image - Import via URL
- - Step Two
- Choose any Windows GZ file for your Droplet OS with Import via URL; it will take about 1 hour.
-
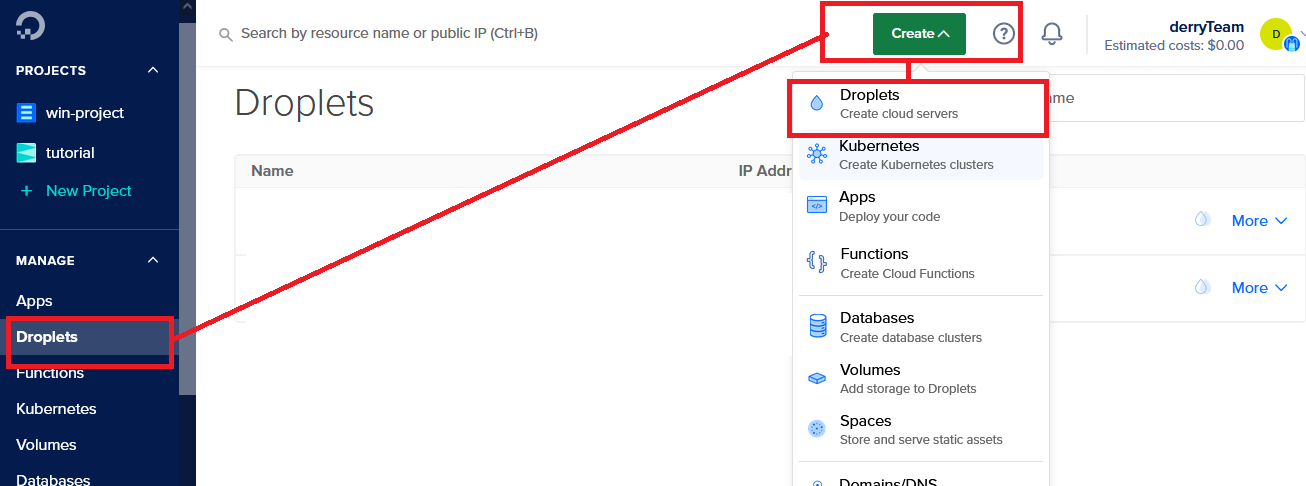
After the Windows OS is successfully uploaded, go to Droplets - Create - Droplets
- - Step Three
- Choose any Region you like.
- On Choose an image, choose custom image, and select the Windows OS
you just uploaded.
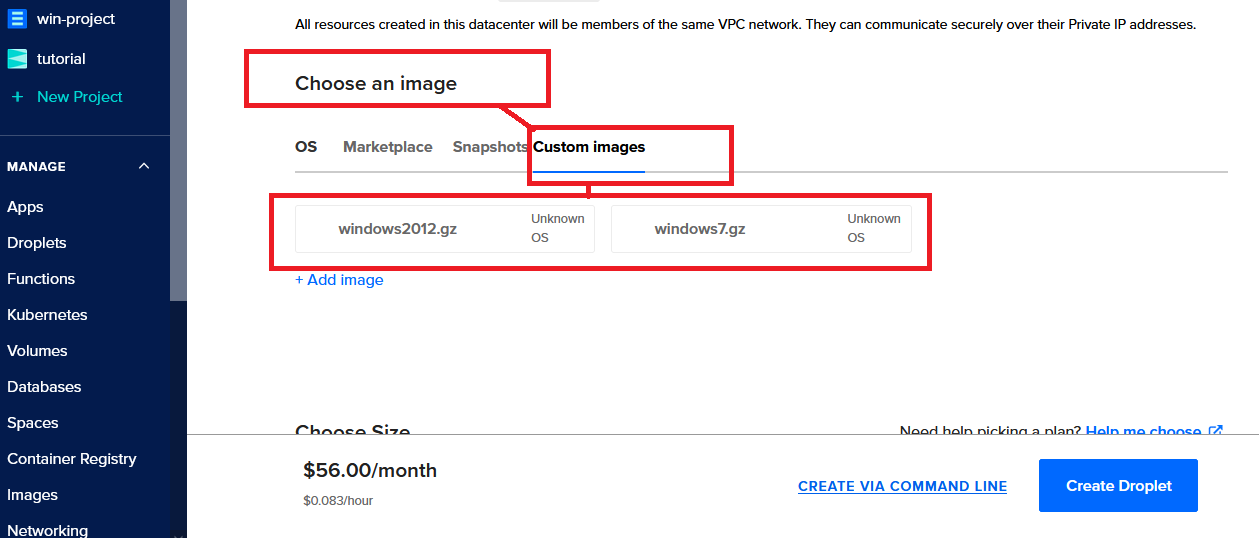
- Choose Droplets type and create.
- - Step Four
- Open it with MSTSC or any Application for RDP.
#Custom Image Summary
Advantages
Save time on the next Windows installation; no need to install every time you make a new droplet.
Disadvantages
Takes 1 hour or more to upload new images.
#Using Recovery Mode
Next method is using recovery mode to install Windows on Digital Ocean. This method not working on all VM Type, mostly work on AMD KVM Machine. Choose Premium AMD Machine. So, this is the alternative way, and I am personally not recommended this method
- Go to Droplets - Create - Droplets
- Choose any Region you want, and on Choose Image just choose any linux image and choose any Droplets Size and type that you want
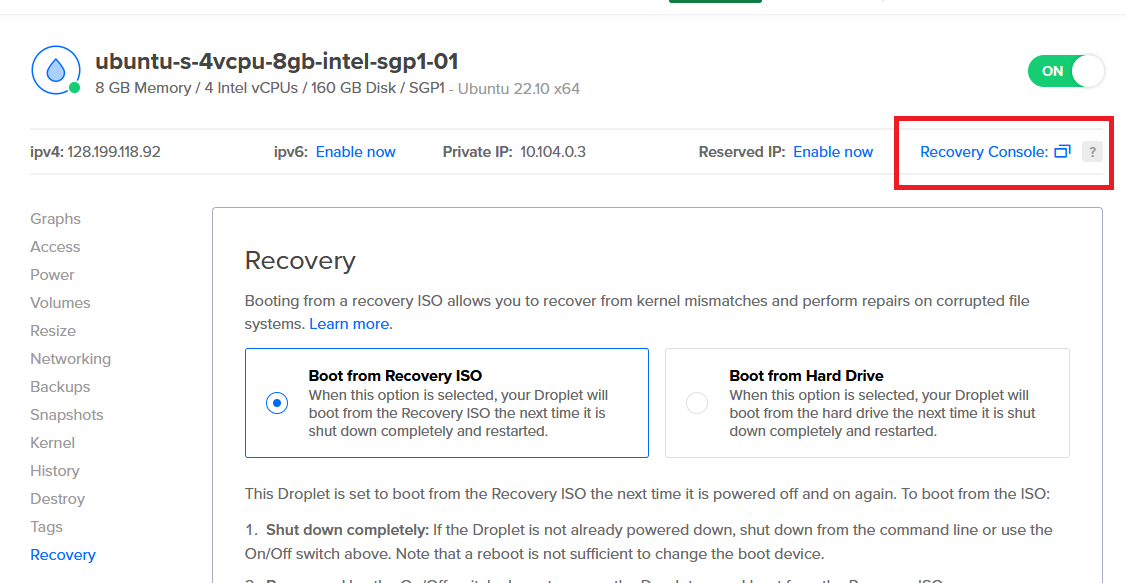
- Turn off the Droplets that you just created and go to Recovery, and pick Boot from Recovery ISO, and turn it on

- Go to Recovery Console
- On Recovery Console. Choose 1 to mount the drive and write the root password
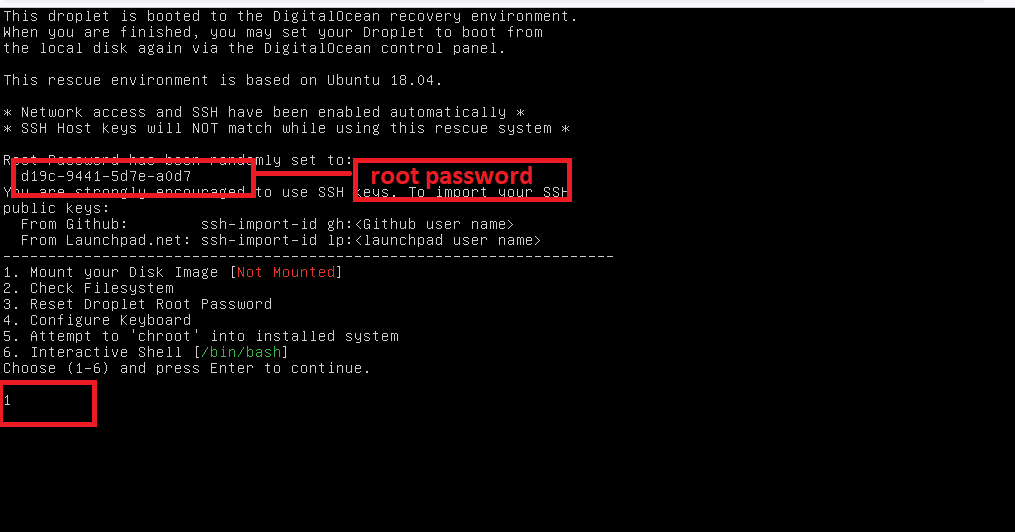
- Open Putty and login to your droplets with root and password that you just write it down.
sudo su - and choose 1 (mount disk image) and choose 5 (Attempt to "chroot" into installation system). And paste this script:
or
And wait until it fully downloaded. Usually takes 5-15 minutes until fully download
- After the image fully downloaded. Go to your Digital Ocean Droplets and set Boot from Hard Drive - turn it off - turn it on
- Use MSTSC to open your RDP
#Recovery Mode Summary
Advantages
No need 1 hour or more to create your RDP
Disadvantages
#Using Direct Installation
Using Direct Installation [Update 22.06.2023]
Ok the third method is direct installation. (Estimated time = 30 minutes to an hour)
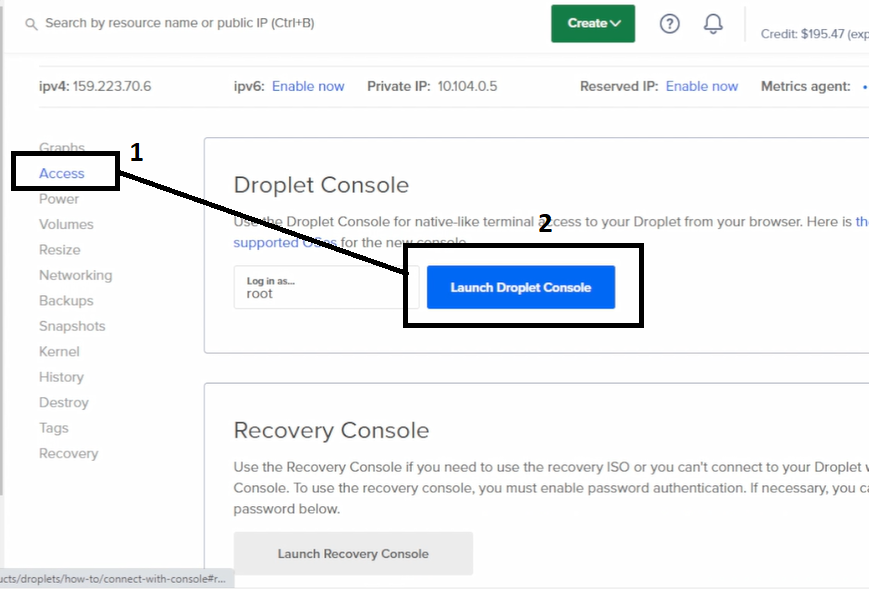
- Go to your droplets Access - Launch Droplets Console
- Paste this script on your Droplets Console
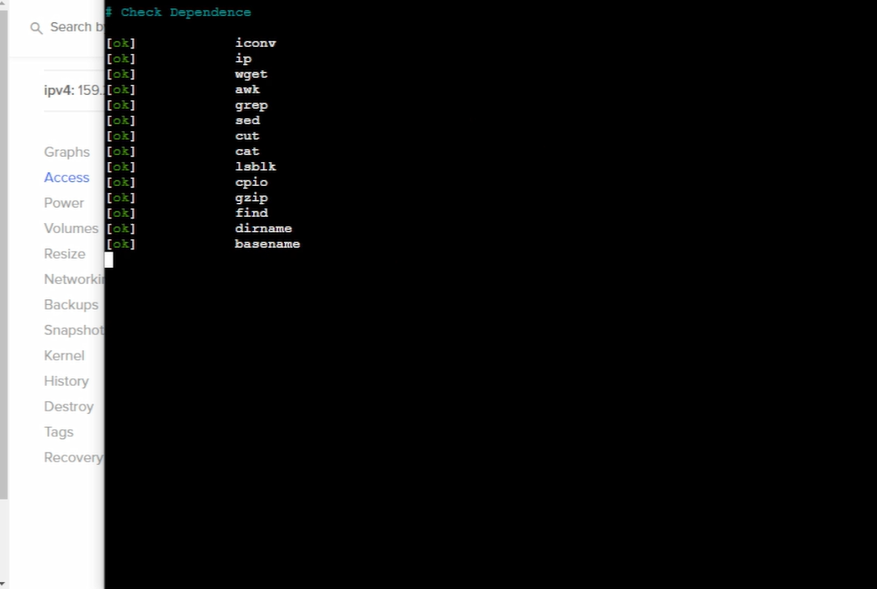
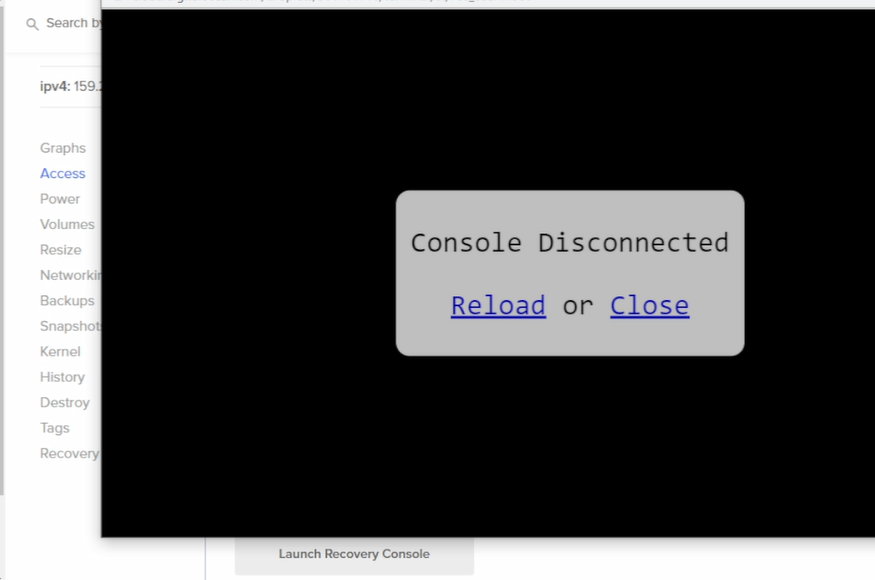
- If you see these screen, that means the first step is completed
- Launch Recovery Console to monitoring the windows installation process

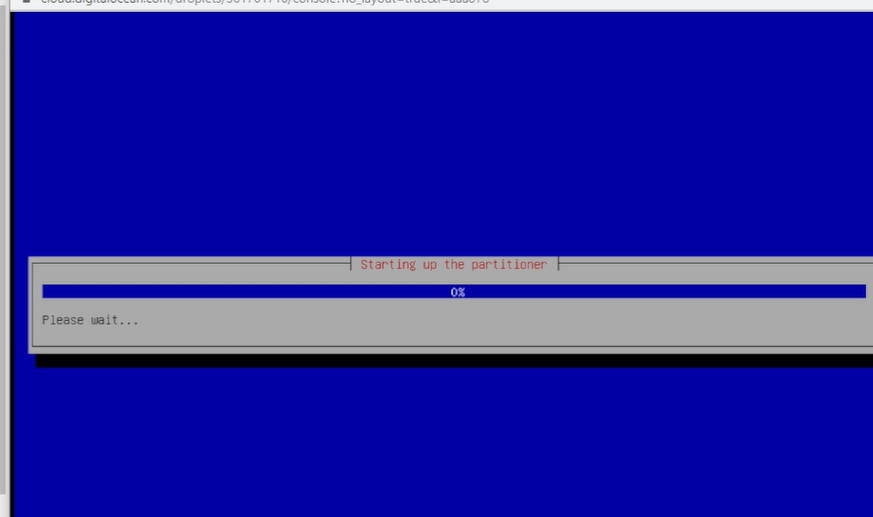
- Wait for about 15 to 30 minutes, and try to open Recovery Console to see if the windows Installation is completed
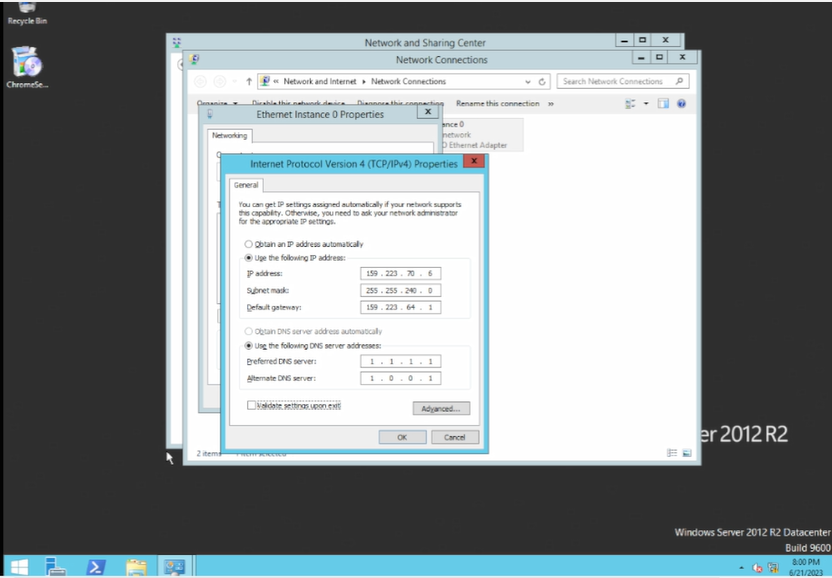
- Change the IP Address manually from recovery console [for the complete process, you can watch the video]
- Finally open your RDP with MSTSC, or others Remote Desktop applications
#Image Link
#Conclusion
Every method has Advantages and Disadvantages, just choose what is suitable for you.
Choose Windows GZ file here
Note
This Windows Installation use subscription. And we are not giving it for free. 5$/yearly. You can make payment. Through Paypal, Cryptocoins, Dana, Ovo, Bank Transfer
1. These images are made for learning purposes only, if you need to use them for a long time, please use a genuine Windows key to activate the system.
2. All images are made by the original MSDN, I can guarantee that there is no private goods, if you do not believe me, please do not use.
3. After Windows installation success on the server, you need to manually expand the disk.
4. Using Windows images may violate the TOS of some merchants, and I am not responsible for being punished by merchants for using images created by me.